

I figured out that ladyfinger, the cookie-like pastry used in a tiramisu was just genoise cake piped out, and to make it easier, I was planning on baking the genoise with the correct amount of xanthan gum. This time I used the kitchenaid. It was much easier this time and the cake turned out much less dense than the chocolate one. (Not that the chocolate one still wasn't good. People loved the truffle covered cake pieces even more than the triple layer truffle cake itself.)
Now tiramisu is a combination of ladyfingers, espresso, possibly a liquor, marscapone cheese and cocoa powder. Pretty simple....
But my espresso machine broke.
I own a Expobar Brewtus II, purchased back in '06 that I've used for years. I pretty much said that it'd pay for itself in a year or two, since I could make my own espresso drinks. It was very worth it. This year I knew I would be doing some long awaited maintenance, replacing gaskets, washers. In fact, the machine was constantly dripping due to a worn out washer (I believe). While baking, I decided to take it apart and clean it. There was quite a buildup of calcium, created due to me not recharging the water softener filter as often as I should. While I cleaned that off, I saw that the washers were indeed worn out and needed replacing.
You can see here: http://coffeetime.wikidot.com/e61-internal-diagram that there are lots of different pieces involved. I found out I will need to replace quite a bit, especially since valve was so worn out, it snapped in half.
I'm tempted to upgrade, but I expect that I'll be able to repair it for under 100 dollars, even less if I don't have to replace all three valves (maybe 25 including shipping). I pretty much need to save money due to needing other repairs done to a large number of things, including my car, which is 13 years old, and seems to have some invisible leaks for oil, steering fluid and antifreeze. It's been said it's not worth repairing.
Of course, I also seem to keep purchasing beer supplies. It's a nice hobby, but like any hobby, it can be expensive, but on the plus side, I learn a craft, new skills and an enjoyable outcome.
In any case, I'm working on repairing the machine now and will redo the cake at another time. In the meantime, I'll see if I have the energy to make it a cake, or if I'll just snack on it with some leftover chocolate truffle when I have my french press brewed coffee.

These days are even busier. Working 10 hour days and occasional weekends means that there's very little time for doing anything else so I cook as little as possible during this time of year. Some weeks, I'll buy a cooked chicken, cook some vegetables, or use frozen ones, and cook some rice. Simple, easy, and I stick the bones into the freezer and make stock at a later date.
This past weekend, on Sunday, I had some potatoes, 2 pounds maybe, an onion, some left over 1/3rd of a block of cheddar cheese, and half a bag of frozen peas and some ground beef 2-3 pounds perhaps.
I diced the onion and mixed it with the meat, along with some worchestershire sauce, ketchup, onion powder, garlic salt, garlic powder, crushed garlic, black pepper and some other spice. It was a sort of pepper powder, perhaps poblano. I also shredded half the cheese and mixed it into the meat as well. I patted this down at the bottom of a foil lined pan and then layered the peas on top.
I then used the kitchenaid attachment to the mixer, a food slicer, and ran the potatoes through this, which grated them nicely and I spread that over the top. The slicer always leaves the last layer behind which either gets stuck, or just stays in the hopper so I collected each of those last bits of potato, diced them up and also added it to the potato layer which was then seasoned with garlic salt and pepper. I added the remaining shredded cheese on top which was also shredded by the kitchenaid.
It hasn't turned out too bad and was pretty simple to make. I've eaten it with salsa, drained yogurt and standard burger condiments. Since it's like a shepards pie, I do like the drained yogurt, or sour cream. I usually have it with some rice.
If I make it again, I'd add some diced tomatoes, and perhaps put some or all the potato on the bottom. Somehow the potato on top darkened as if it was exposed to too much air.

Génoise cake, is a spongy firm type of cake primarily made of eggs, sugar, flour and sometimes butter. It's a great cake base, and is an often used cake style for decorated cakes and cakes with layers of something inbetween. It can also be glazed or soaked with flavored syrups or flavored liquors.
I used a recipe that called for:
4 eggs
75 grams unsalted butter (melted)
125 grams sugar
75 grams flour
and to make it chocolate 50 grams melted chocolate.
To me, grams are easier because I have a scale, and because I'm a horrible measurer of dry cups. (I don't bother leveling). The chocolate I happened to use was Ghiridellis since I always keep several bars of their chocolates around for baking and truffles and I used their unsweetened baking chocolate. I used plain, white refined sugar, and I used a gluten free flour mix I had made using:
4 cups rice flour
2/3 cups corn starch
2/3 cups potato starch
2/3 cups tapioca flour
Corn starch and potato starch are interchangable but because I have both on hand, I like doing half and half whenever I make flour. I will often try different flours in addition to these, including; quinoa, millet, soy, coconut, chestnut, buckwheat, oat and almond. I usually use it separately depending on what I make. I also leave out the xanthan/guar gum, since I ordinarily add it during the baking process since some gluten free baked goods tend to require more for some products (bread which often needs to be firm and chewy) and less for others (like certain cakes). However, since I haven't baked in a while (or even made pancakes in half a year) I managed to completely forget the xanthan gum! This likely resulted in a flatter, denser cake than I was expecting. It was still a good texture though, despite this omission. I'll be sure to use it next time, and then perhaps try coconut flour for extra moisture.
I actually used 5 eggs, because two of them were on the small side, so it should have averaged out to 4 large eggs.
The truffle material is simply chocolate and cream. Sometimes people will add corn syrup, or butter. I normally do chocolate and cream after having watched Jaques Torres do it back when the Food Network showed informational shows. This time around, I followed what was on the Ghiridelli bar wrapper of:
8 ounces 60% chocolate (2 bars)
6 Tbsp butter (58 grams)
1/3 cup heavy cream.
Normally I like my chocolate darker and I get their 70% but I was out and the store didn't have any that I saw.
 |
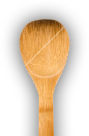
| Flour, melted butter, sugar |
 Here is everything ready to go, except for the xanthan gum. It should have been added to the flour at this stage.
 Once it became lukewarm and frothy, I took it off the heat and continued to whisk. You want to whisk until it's creamy and thick and will form ribbons when it drizzles back into the bowl. Had I known that it would take so long, I would have poured it into a mixer. In the meantime, I used a separate bowl on top of the warm water and placed the 50 grams (2 ounces) of baking chocolate where it would slowly melt.
I gave up and started slowly dizzling in the butter while whisking and then sifting in the flour, followed by the melted chocolate. There wasn't a good chance to get pictures of any of those steps.

During that 25 minutes, I made the truffle material. I put the cream and the butter into a small saucepot and put that on low. While this was heating up, I broke the chocolate up into pieces and put it into a second steel bowl. Once the cream/butter was starting to bubble, I poured the mixture over the chocolate and let it sit there for about a minute for the heat to melt the chocolate. Then I stirred it with a spatula until it was creamy and smooth.
 |  |
Before | After |
Once the cake finished, I let it cool on a rack for a while, then sliced it into three equal sections and stacked them on top of each other and sliced around the edges so that it was even. I then spread the cooled ganache/truffle/frosting on each slice, getting a good, thick layer, then stacked them up on each other and covered that in the frosting. Because it didn't have a smooth glossy coating, I had two options. One option seems to be to dip a knife or spreader in hot water to warm up the metal, wipe the metal and then smooth it all over, but since I couldn't find my spreader (I believe I stored it away somewhere), I just took some more ganache and warmed it in the microwave and poured it over the top. Once it cooled, it has a nice glossy layer. I would plan to serve it with either ice cream, or whipped cream, some coffee and maybe a few rasberries. It's a dense chocolaty but not sweet cake.


In the last picture, you can see what I did with the cake edges. I melted more truffle/ganache and dipped the pieces and placed them onto the other side of the baking parchment paper. I was thinking of covering them in cocoa powder like truffles are coated, but somehow it just didn't feel or taste right this time. I would consider tempering chocolate (going through a heating and cooling process with plain chocolate so that when it cools it's glossy and hard) and then covering the truffles with that, leaving a nice candy-like piece of chocolate coated truffle cake.
I still cannot seem to locate my camera cable in order to transfer any pictures. I can't imagine where the cable was last left at. What I've been doing lately is mostly cleaning, however in the meantime, I have transferred beer from one 5 gallon keg to a second 5 gallon keg, to which I've added some dextrose syrup and will be leaving for approximately three or more weeks to naturally carbonate. This saves me from using a co2 gas tank, plus lets the beer's flavors mellow and age.
I've also been working on plans for a Gluten Free Stout which didn't go as well as I'd like. There are several recipes floating out on the internet now, particularly where some people have been working on various renditions of a stout. A Stout tends to be a dark, slightly sweet, and heavy beer. Heavy in the way of mouthfeel, texture and flavor. It tends to be made from darkly roasted grains and have a coffee or chocolate flavor. Those of us unable to have the normal grains have to try to find different workarounds using toasted oats, buckwheat and other gluten free grains.
There are many combinations that I would like to try, but I had toasted about half a pound of gluten free steel cut oats until it was a fairly dark color. I may have overtoasted it, or toasted it too quickly because what had happened when I steeped it in hot water two weeks later, was that it gave off a burnt odor. Perhaps I'll let it sit and degas even longer than two weeks next time. It did give off a fairly dark color however. I believe that it would be better if the grains contained sugar (like malted grains) so that it would caramelize rather than toast.
